- Locate the roll pin near the top of the coreholder. Using a permanent black marker, draw a line directly from the roll pin hole, up to the top of the coreholder and approximately ¼" way over the top of the coreholder. This will allow for easy orientation of the stem and body when re-assembling the coreholder.
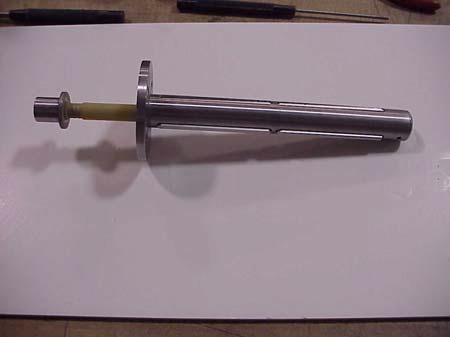
- Remove the roll pin and retain for reassembly. The figure below shows the roll pin of a 1" dia. Air coreholder being removed.

- (Preferred Method) Wrap the coreholder in a protective cloth and insert the body of the coreholder sideways into a vise. Tighten the vise against the body of the coreholder.
- Using a 3/8” dia. or smaller pin punch and hammer, tap the top center of the coreholder which will break the loctite seal between the coreholder stem and the body. Once the seal has been broken, continue tapping until the stem can be removed from the bottom of the coreholder. Note: Once the stem is removed from the body of the coreholder, the leaves will no longer be supported within the coreholder. Retain the leaves for re-assembly.
- Replace the defective bladder with the replacement bladder and secure onto stem using the nylon coated string provided with the kit.
- Carefully re-insert the stem and leaves into the body of the coreholder. Insert the stem so that the marker lines drawn in Step 1 are aligned. Using a wood block as a buffer between the lower stem post and the hammer, tap the wood block until the stem is tightly positioned inside the body of the coreholder. Re-insert the roll pin to secure.
Menu